18.8.13
8.7.13
DIY Clear Clutch
Chic plastic? Nothing is impossible. Inspired by Chanel's clear plastic clutch, here is a super easy DIY! And do not be afraid of putting plastic through a sewing machine, no harm I promise.
 |
| Source: Tommy Ton |
Stuff you need:
A4 Plastic Sheet
Bias Tape
Sewing machine
Button mechanism
Small Embellishment
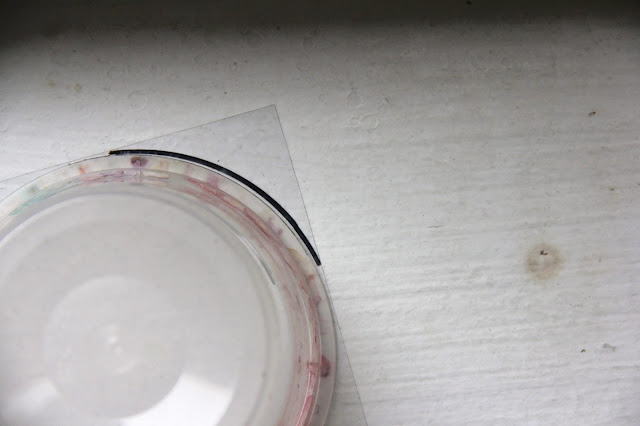
1. Use a rounded object and place on two corners on the short side of the A4 plastic sheet, trace
2. Cut along the lines
3. Sew around just 3 sides of the sheet with the bias tape
4. Mark the centre of the un-biased side and sew one part of the button here
5. Fold over and sew down the sides, leaving a gap at the bottom
6. Sew the other part of the button to the flap of the clutch. On the other side of the plastic attach the embellishment
Ta-daa! So chic, so quickly
2.7.13
Inspiration: Colored Short-Suits
Fashion week is so exciting! Apart from the fashion shows and possibly an even more treasured highlight of these occasions are the snaps of street fashion. Here, I'm loving the short-suit! Especially the bold colors, accessorised with an adorable flower each time. How about picking up some dye and shortening some trousers into a pair of camel shorts (an ever lasting obsession of mine)?
3.5.13
Before and After: Denim Shorts With A Splash Of Color
I have always loved my staple pair of distressed denim shorts, to the point where I may have slightly overused. Overused to the point where ripped turned to torn. So I decided not to throw my beloved denims away, rather add a hint of pink.
I experimented with a few different variations:
This was my favorite, not too much or little and slightly wacky.
10.2.13
Photo Diary: Italy Part 3
Finally, I take you to a small town called Montepulciano followed by the beautiful city of Florence. My favorite thing about these two places would definitely have to be the views and the food. Both were absolutely amazing. Below are a couple of photos I took while I was there. This is the last Italian photo diary, so enjoy!
13.1.13
DIY Floral Circle Skirt
Recognize this fabric? Well if you do it is from this summery tutorial I did way back in August of last year, DIY floral printed shorts. Boy, did that year just whiz by. As the new year arrives I am busy clearing out last years things, when my friend and I bought this fabric I clearly remember the shop keeper desperately trying to sell us the entire roll, 3m extra than we needed. We stood there for about 20 minutes trying to say no thank you, we don't have enough money! We barely had any pocket money left. Luckily in the end he gave the rest of it to us for free, I am sooo happy for that. Linen is the perfect circle skirt material, and I still don't have enough pocket money to go out and buy more of it. Oh the problems with being a teenager. For this DIY adventure I was inspired my a present that my mum bought me for christmas, this gorgeous Topshop dress. It is so simple, but the circleness of skirt is incredibly flattering on any body type. I've seen many people wear circle skirts around town, it usually looks stunning.
Stuff you need:
Zipper
2m of floral linen
Sewing machine
1. Measure you waist and calculate the radius of that (correct me if I'm wrong, but I'm pretty sure that is your waist length/2pi). Fold your fabric in half horizontally and then again vertically as can be seen below. The quarter-circle labeled w needs to have the radius of your waist. L should be length you would like your skirt to be + seam allowance. Cut along these 2 lines, once you open it all up it should look like a large donut.
2. Next cut a slit to open up the donut. Seam both the outer and inner circles.
3. Fold over the open edges and seam them up.
4. Bring the 2 edges together place the zipper face down on top, mark where it ends. Making sure both edges are touching and fronts of either side are facing each other sew from the bottom of the skirt up till the mark. Then attach the zipper. I found this tutorial really helpful.
Spin and twirl around in this new artwork. Until next time!
Subscribe to:
Posts (Atom)


